Poured-in-place rubber surfaces are the most accessible and compliant safety surfaces available. It offers the a lot of creativity and can be fairly cost-effective due to its longevity. To protect your investment, clean and maintain your poured-in-place surfacing regularly. With that said, if you believe your playground surfacing needs some extra TLC, consider the following options.
Re-Topping
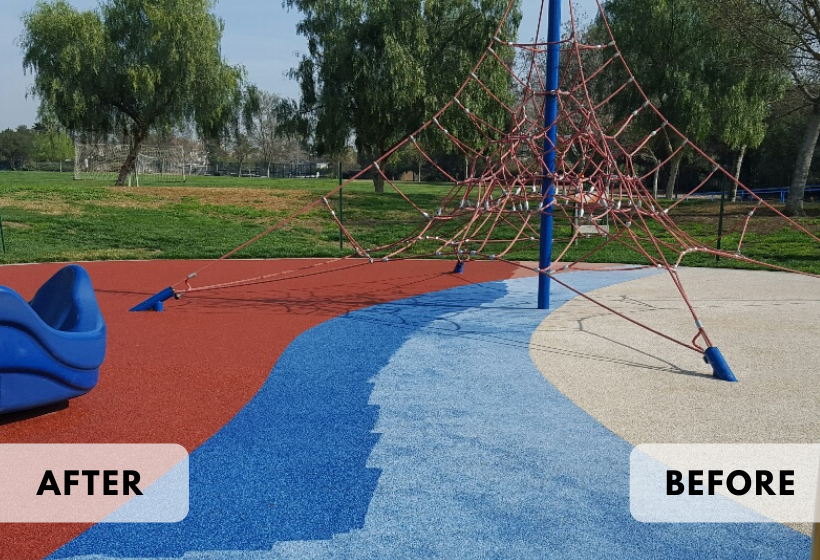
Over time, the weather can significantly affect the surface of your playground. Even with adequate care and maintenance, your playground surface will eventually see signs of wear and tear. In addition to regular maintenance, re-topping your poured rubber surface is a proactive way to minimize damage.
How do I know if my playground surface needs to be re-topped?
Poured rubber surfaces experiencing holes, cracking, seam separations, and cushion layer wear, can benefit from a surface re-topping. Prevent non-compliance by scheduling re-toppings every 18 to 24 months (depending on usage).
How to apply a new coat?
To apply top coats, operators roll specially formulated urethane binders onto the surface. Once applied, it penetrates the surface to restrengthen the bonding of rubber granules. The coating also provides UV protection from sun damage and helps minimize future cracks and granulation.
You can typically complete most re-topping solutions in less than a day. Once applied, it's recommended that you wait an additional day for proper curing. After the maintenance and repairs are complete, your playground can resume normal play after about 48 hours.
Demo and Replace
Unfortunately, some playground surfaces are beyond a re-topping solution. If an older playground lacks regular maintenance, it may require a complete replacement. Look for signs of significant wear, such as cracks, holes, or areas where the surfacing has become thin or worn down. These areas can pose safety risks and may require replacement.
Replacing old playground surfacing typically involves several steps. We recommend using the following steps as a guide during this process:
- Assessment: Start by assessing the condition of the existing surfacing. If playground surfacing is no longer providing adequate cushioning, then a replacement might be necessary. By replacing a badly damaged or worn system, you can return your playground flooring to compliance.
- Removal: Remove the old surfacing material by manually removing the materials or using machinery such as a skid steer or excavator.
- Preparation: Prepare the sub-base by ensuring it is level, free of debris, and properly graded. If necessary, add additional fill material or compact the existing base to create a stable foundation for the new surfacing.
- Selection of new playground surfacing: Choose the appropriate type of surfacing based on the needs of your playground. Consider factors such as safety requirements, durability, maintenance needs, and budget. Options may include rubber tiles, poured-in-place rubber, synthetic turf, engineered wood fiber, or other materials.
- Installation: Install the new surfacing according to the manufacturer's instructions and industry standards. After installing the surfacing, make sure to properly secure it, level it, and eliminate any hazards.
- Safety inspections: Conduct thorough safety inspections to verify that the newly replaced playground surfacing meets all applicable safety standards and guidelines.
It is important to note that the specific process and requirements for replacing playground surfacing may vary depending on multiple factors. Factors may include location, local regulations, and the type of surfacing being used. Consult playground safety professionals or experts in playground surfacing to determine the appropriate course of action for replacing the surfacing.

.jpg)